There is really nothing like having your pictures printed and holding them in your hand...
One of my favorite ways to enjoy the photos I take with my phone is as sets of 4x4 prints. We have a couple of cork boards in our living room that are covered with small prints of this size.
I wanted to try something new a few weeks ago, so I decided to make a montage print of some of my favorite pictures from the month of September.
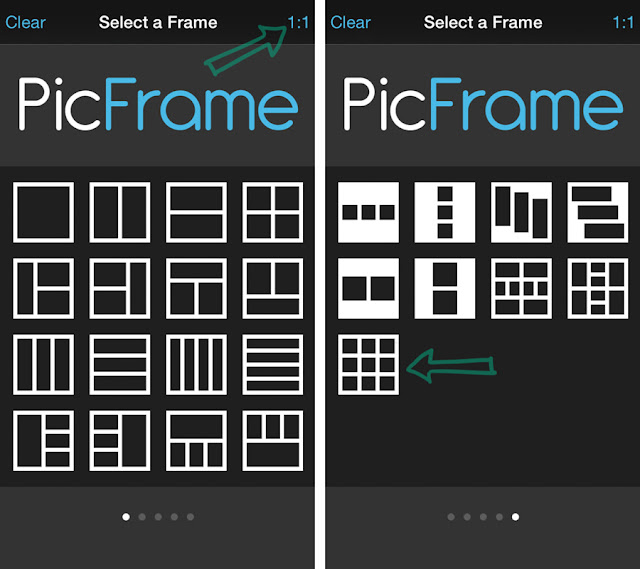
I made my photo collage using PicFrame, an incredibly handy photo app I have on my iPhone. It has plenty of built-in options that are great for adding borders to my images, creating my own scrapbook pages, and making collages like the one I made here. PicFrame has several pages of templates to choose from. My favorite is the 3x3 grid.
I put together the following tutorial in case you want to make your own montage:
- First, download and open the PicFrame app (only $0.99 in the app store at the time of this writing)
- To keep your collage a square, make sure your aspect ratio is set to 1:1 in the upper right hand corner.
- Swipe to the last page of frames and select the frame that holds 9 square images.
- Once the desired frame opens, tap on a square to select an image from your camera roll to fill the square.

- Move the image around within the chosen square until it looks right. Zoom to crop in closer if needed.
- Continue to fill each square in the grid with a picture until all the squares are filled.
- If you don't like where you have placed an image, tap on that square and replace with a different photo.
- Important! You must adjust the resolution at the bottom of your screen by moving the circle all the way to the far right, above the words "Save/Print" if you want to make an actual print of your collage.
- Save your collage by pressing the orange "Save" button.


